
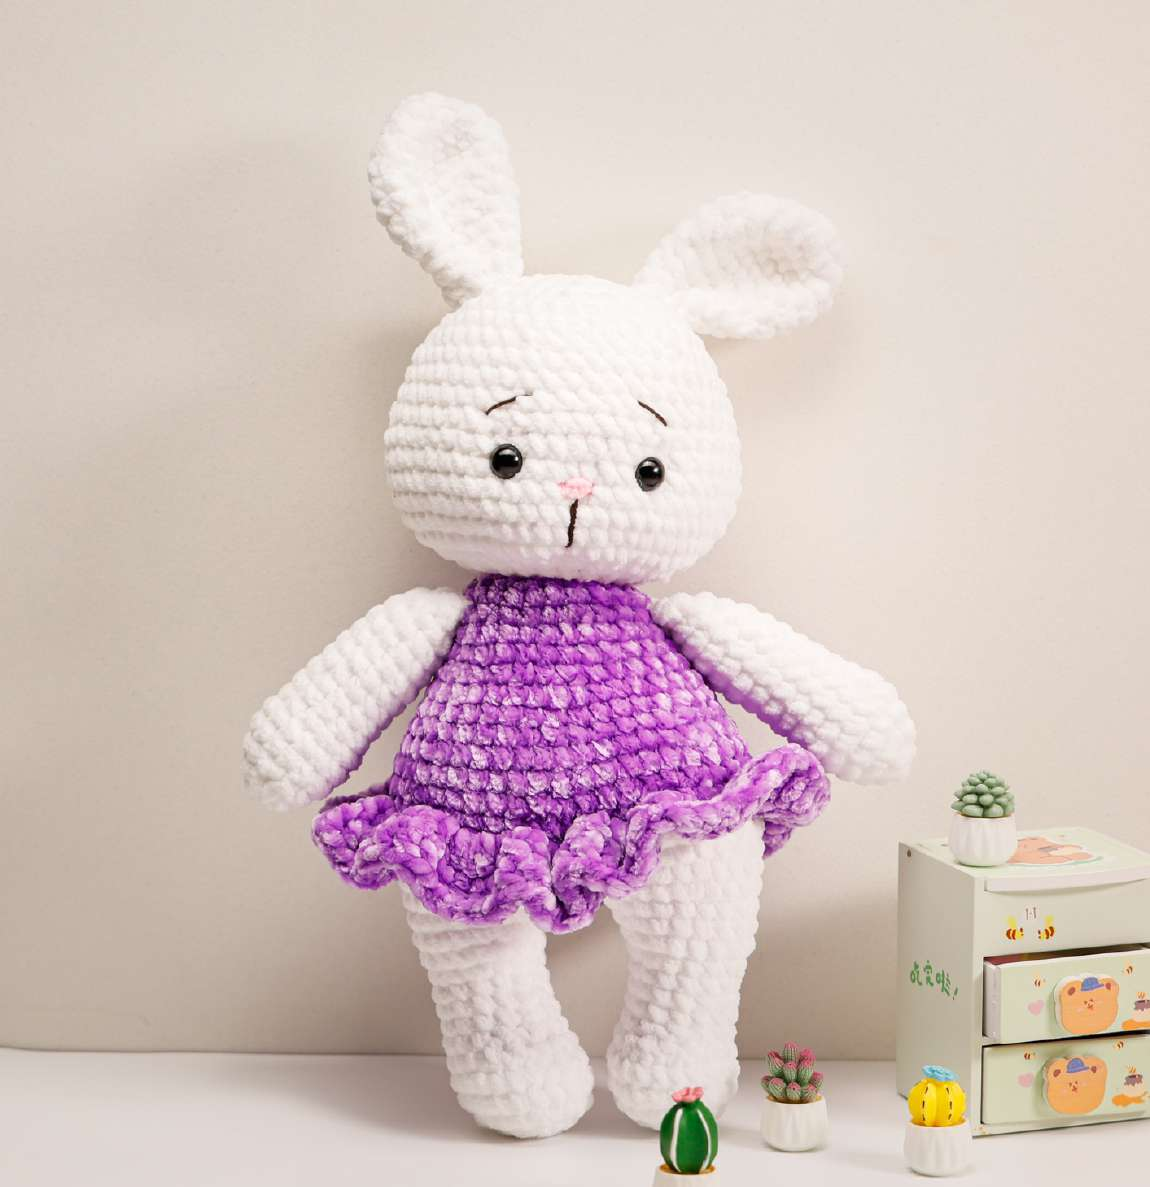
Looking for a delightfully sweet and plush amigurumi project? Meet Lily Bunny! This beautiful crochet plushie features soft white chenille yarn, a ruffled purple dress, and sweet facial features that make her the perfect gift for plush lovers and kids alike.
| Finished Size | ~35 cm tall (13.7 inches) |
| Difficulty Level | Easy to Medium |
| Terminology | US Crochet Terms |
- Plush/Chenille Yarn (Sport weight equivalent):
- Main Color: White (Chenille 01)
- Dress Color: Purple (Chenille 13)
- Embroidery Threads:
- Brown thread (to embroider eyebrows and muzzle line)
- Pink thread (to embroider the nose)
- White thread (for head sculpting)
- Safety Eyes: 14 mm (1 pair).
- Crochet Hook: 5.0 mm.
- Stuffing: Polyester Fiberfill.
- Yarn needle, stitch markers, and scissors.
| Abbreviation | Stitch Meaning |
|---|---|
| sc | Single Crochet |
| inc | Increase (2 single crochets in 1 stitch) |
| dec | Decrease (Single crochet 2 stitches together) |
| dc | Double Crochet |
| BLO / FLO | Back Loop Only / Front Loop Only |
Use White plush yarn and 5.0mm hook. Stuff only 2/3 of the arm.
- Rnd 1: 6 sc into a magic ring (6)
- Rnd 2: 6 inc (12)
- Rnd 3: (3 sc, inc) * 3 (15)
- Rnds 4-5: 15 sc (2 rounds)
- Rnd 6: (3 sc, dec) * 3 (12)
- Rnds 7-14: 8 sc (8 rounds)
- Rnd 15: (4 sc, dec) * 2 (10)
- Rnd 16: 10 sc (10)
Fold the arm in half and crochet 5 sc through both sides to seal. Fasten off and cut yarn, leaving a tail for sewing. Note: Sew the arms two rounds under the beginning of the head.
Use White plush yarn. Stuff as you go.
- Rnd 1: 7 sc into a magic ring (7)
- Rnd 2: 7 inc (14)
- Rnd 3: (1 sc, inc) * 7 (21)
- Rnds 4-5: 21 sc (2 rounds)
- Rnd 6: 7 sc, 4 dec, 6 sc (17)
- Rnd 7: 7 sc, 2 dec, 6 sc (15)
- Rnds 8-10: 15 sc (3 rounds)
- Rnd 11: (4 sc, inc) * 3 (18)
- Rnd 12: 18 sc (18)
- Left Leg: Rnd 13: Crochet only 14 sc, then fasten off and cut yarn.
- Right Leg: Rnd 13: Crochet 18 sc. Do not cut yarn – we will continue directly into the body!
- Rnd 1: Crochet 7 sc on right leg, ch 3, 18 sc on left leg, 3 sc along chain, 18 sc on right leg, 3 sc along chain. Place marker here. (42)
- Rnd 2: (6 sc, inc) * 6 (48)
- Rnds 3-6: 48 sc (4 rounds). Change to Purple yarn.
- Rnd 7: 48 sc (48)
- Rnd 8: Work through BLO: 48 sc (48)
- Rnd 9: (6 sc, dec) * 6 (42)
- Rnds 10-11: 42 sc (2 rounds)
- Rnd 12: (5 sc, dec) * 6 (36)
- Rnds 13-14: 36 sc (2 rounds)
- Rnd 15: (4 sc, dec) * 6 (30)
- Rnds 16-17: 30 sc (2 rounds)
- Rnd 18: (3 sc, dec) * 6 (24)
- Rnd 19: 24 sc (24)
- Rnd 20: (6 sc, dec) * 3 (21)
Stuff the body firmly, especially in the neck area. Cut the purple yarn. We will continue with the head, but first, we make the skirt!
Attach Purple yarn to the back of the body in the front loops of Round 8 with the body held upside down:
- Rnd 1: (2 dc in one stitch) * 48 (96)
- Rnd 2: 96 dc (96)
Fasten off, cut yarn, and hide the thread inside the body.
Change yarn to White color. Stuff as you go.
- Rnd 1: 21 sc (21)
- Rnd 2: 21 inc (42)
- Rnd 3: (6 sc, inc) * 6 (48)
- Rnd 4: (7 sc, inc) * 6 (54)
- Rnds 5-9: 54 sc (5 rounds)
Insert 14mm safety eyes between Rnds 8 and 9 with 8 stitches between them. - Rnd 10: (7 sc, dec) * 6 (48)
- Rnds 11-13: 48 sc (3 rounds)
- Rnd 14: (6 sc, dec) * 6 (42)
- Rnd 15: 42 sc (42)
- Rnd 16: (5 sc, dec) * 6 (36)
- Rnd 17: (4 sc, dec) * 6 (30)
- Rnd 18: (3 sc, dec) * 6 (24)
- Rnd 19: (2 sc, dec) * 6 (18)
- Rnd 20: (1 sc, dec) * 6 (12)
- Rnd 21: 6 dec (6)
Make sure that the head is stuffed firmly. Close the opening and hide the yarn inside.
Use White plush yarn.
- Rnd 1: 6 sc into a magic ring (6)
- Rnd 2: 6 inc (12)
- Rnd 3: (1 sc, inc) * 6 (18)
- Rnd 4: (2 sc, inc) * 6 (24)
- Rnds 5-6: 24 sc (2 rounds)
- Rnd 7: (6 sc, dec) * 3 (21)
- Rnd 8: (5 sc, dec) * 3 (18)
- Rnd 9: (4 sc, dec) * 3 (15)
- Rnds 10-12: 15 sc (3 rounds)
Fasten off and cut yarn, leaving a tail for sewing. Fold the ear in half and sew the ends together. Sew the ears on top of the head with 4 stitches between them.
- Head Sculpting: Use white thread to pull gently from the base of the neck to the inner eye corners to create sculpted eye sockets.
- Nose & Muzzle Embroidery: Embroider the nose using pink thread centered between the safety eyes, and use brown thread to stitch the eyebrows and muzzle line.
- Arm Sewing Position: Sew the arms two rounds below the beginning of the head.
- Ear Placement: Sew the ears at the top of the head with 4 stitches spacing.
And voila! Your adorable Lily Bunny is ready to snuggle. With her sweet ruffled dress and floppy ears, she is bound to be a favorite among toy collectors and little ones alike.
Have you tried making plush bunnies with chenille yarn before? Share your photos and leave your comments below! Happy crocheting!