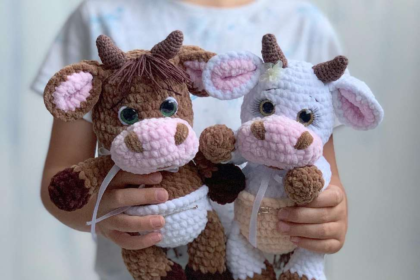

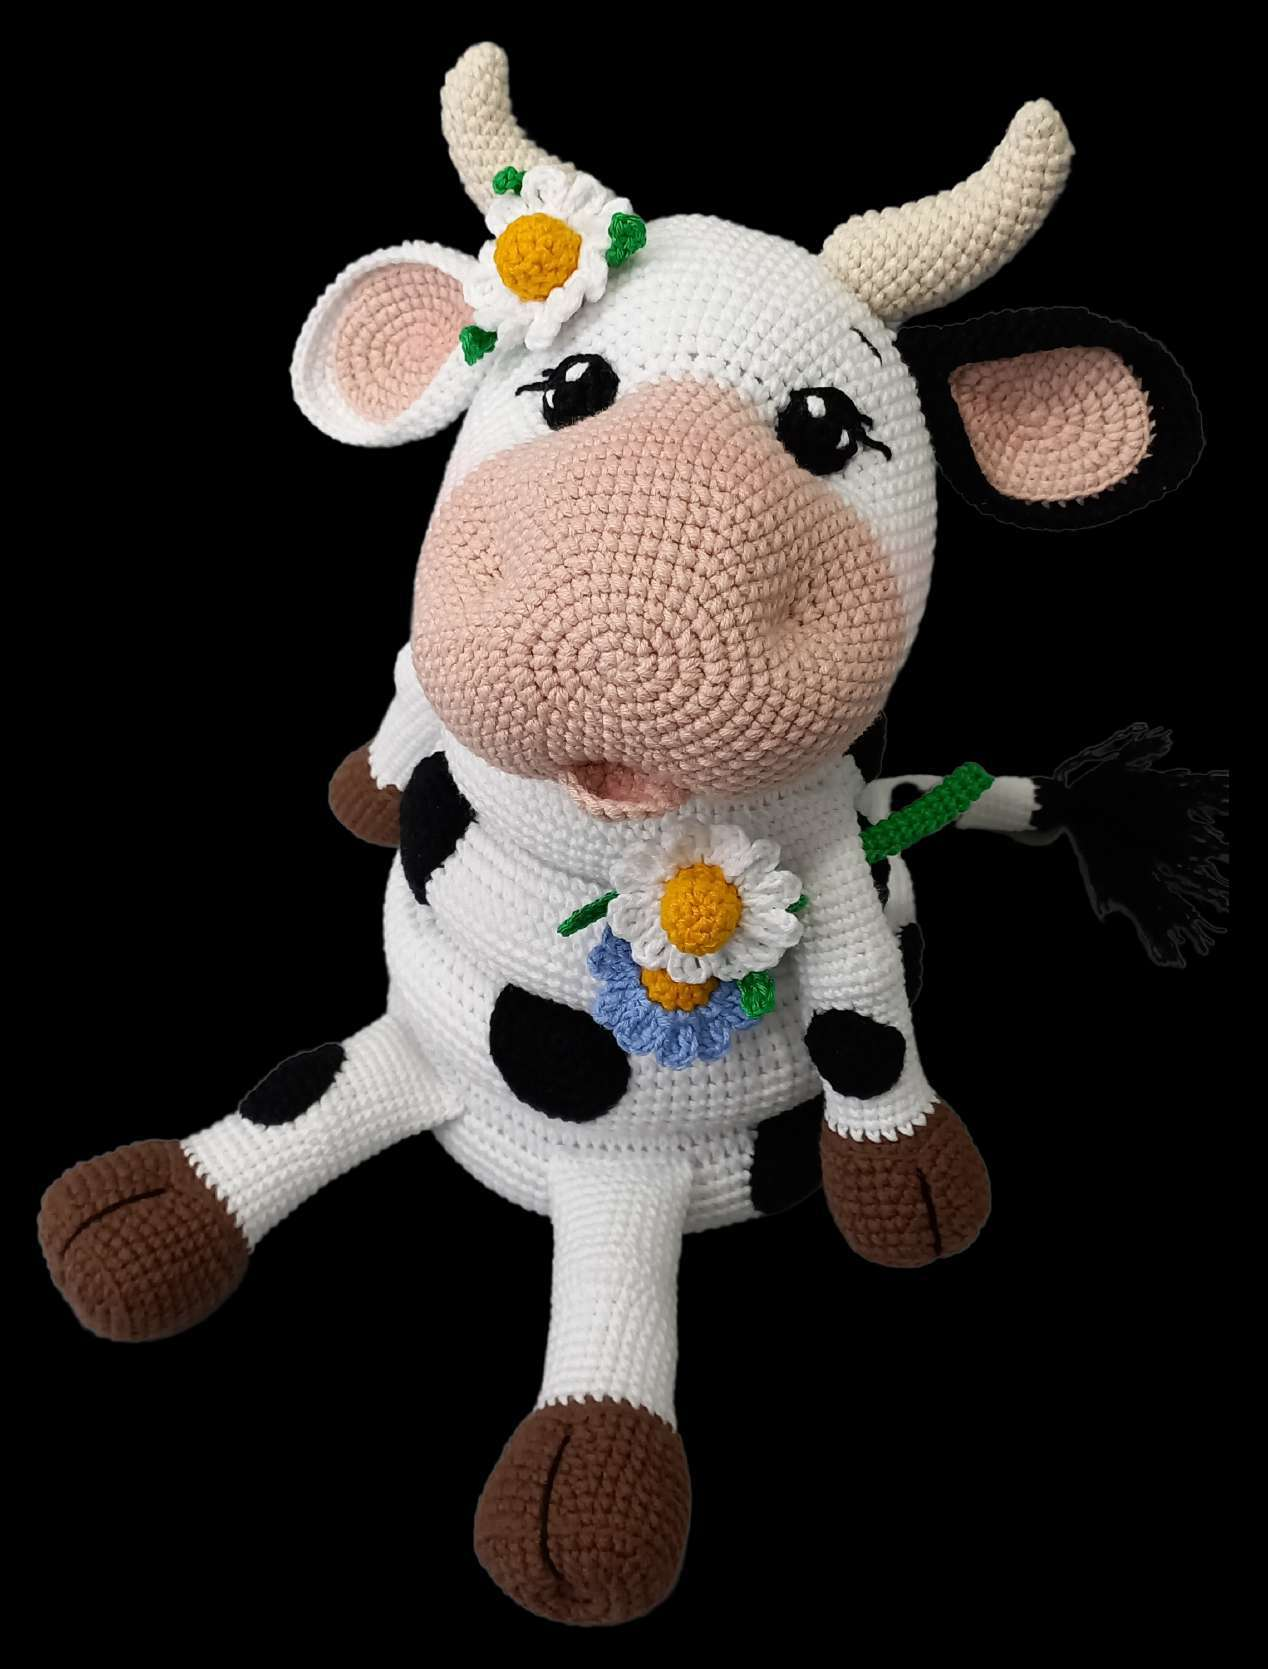
Looking for an engaging, educational, and super cute amigurumi project for babies and toddlers? This Crochet Cow Stacking Toy (Ring Tower) is a charming interactive plush set featuring a central cone base, removable stacking rings, hooved legs, detailed horns, an udder, and customizable black spots!
| Project Type | Interactive Stacking Ring Tower Toy |
| Difficulty Level | Intermediate |
| Terminology | US Crochet Terms |
- Yarn (Cotton Blend / Sport Weight):
- White: Alize Cotton Gold 55 (2 balls, ~660m)
- Black: Alize Cotton Gold 60
- Brown: Alize Cotton Gold 493
- Light Pink: Alize Cotton Gold 161
- Ivory: Alize Cotton Gold 67
- Yellow & Green: (Optional for flower accessory)
- Crochet Hook: 3.0 mm (or size appropriate for your yarn weight).
- Notions & Hardware:
- Polyester Fiberfill stuffing
- Velcro tape (optional for removable udder)
- Safety eyes 12 mm (optional, or crocheted eyes)
- Tapestry needle and sharp scissors
| Abbreviation | Stitch Meaning |
|---|---|
| MR | Magic Ring |
| sc | Single Crochet |
| inc | Increase (2 sc in 1 st) |
| dec | Decrease (sc 2 together) |
| hdc | Half Double Crochet |
| dc / tr | Double Crochet / Treble Crochet |
| BLO / FLO | Back Loop Only / Front Loop Only |
Use White yarn and 3.0mm hook.
- Rnd 1: 6 sc in MR (6)
- Rnd 2: 6 inc (12)
- Rnd 3: 12 sc (12)
- Rnd 4: (1 sc, inc) * 6 (18)
- Rnds 5-6: 18 sc (18)
- Rnd 7: (2 sc, inc) * 6 (24)
- Rnds 8-10: 24 sc (24)
- Rnd 11: (3 sc, inc) * 6 (30)
- Rnds 12-15: 30 sc (30)
- Rnd 16: (4 sc, inc) * 6 (36)
- Rnds 17-21: 36 sc (36)
- Rnd 22: (5 sc, inc) * 6 (42)
- Rnds 23-28: 42 sc (42)
- Rnd 29: (6 sc, inc) * 6 (48)
- Rnds 30-36: 48 sc (48)
- Rnd 37: (7 sc, inc) * 6 (54)
- Rnds 38-45: 54 sc (54)
- Rnd 46: (8 sc, inc) * 6 (60)
- Rnd 47: Work FLO: (9 sc, inc) * 6 (66)
- Rnd 48: 5 sc, inc, (10 sc, inc) * 5, 5 sc (72)
- Rnd 49: (11 sc, inc) * 6 (78)
- Rnd 50: 6 sc, inc, (12 sc, inc) * 5, 6 sc (84)
- Rnd 51: (13 sc, inc) * 6 (90)
- Rnd 52: 7 sc, inc, (14 sc, inc) * 5, 7 sc (96)
- Rnd 53: (15 sc, inc) * 6 (102)
- Rnd 54: 8 sc, inc, (16 sc, inc) * 5, 8 sc (108)
- Rnd 55: (17 sc, inc) * 6 (114)
- Rnds 56-62: 114 sc (114)
- Rnd 63: (17 sc, dec) * 6 (108)
- Rnd 64: 8 sc, dec, (16 sc, dec) * 5, 8 sc (102)
- Rnd 65: (15 sc, dec) * 6 (96)
- Rnd 66: 7 sc, dec, (14 sc, dec) * 5, 7 sc (90)
- Rnd 67: (13 sc, dec) * 6 (84)
- Rnd 68: 6 sc, dec, (12 sc, dec) * 5, 6 sc (78)
- Rnd 69: (11 sc, dec) * 6 (72)
- Rnd 70: 5 sc, dec, (10 sc, dec) * 5, 5 sc (66)
- Rnd 71: (9 sc, dec) * 6 (60)
- Rnd 72: Connect Rnd 71 with Rnd 47 (BLO) using 60 sc (60). Fill with fiberfill as you go!
- Rnd 73: (8 sc, dec) * 6 (54)
- Rnd 74: (7 sc, dec) * 6 (48)
- Rnd 75: (6 sc, dec) * 6 (42)
- Rnd 76: (5 sc, dec) * 6 (36)
- Rnd 77: (4 sc, dec) * 6 (30)
- Rnd 78: (3 sc, dec) * 6 (24)
- Rnd 79: (2 sc, dec) * 6 (18)
- Rnd 80: (1 sc, dec) * 6 (12)
- Rnd 81: 6 dec (6). Cut yarn, close opening, and weave in tail.
Legs (Make 2): Start with Brown yarn (hoof). Rnd 1: 6 sc in MR (6) → Rnd 6: 36 sc. Rnd 7: BLO 36 sc. Continue decreases down to Rnd 15 (change to White yarn). Rnds 16-35: 24 sc. Stuff 2/3 of leg. Rnd 36: Fold in half and connect with 12 sc. Embroider black line on hoof.
Tail: White yarn. Rnd 1: 6 sc in MR → Rnd 22: 18 sc. Rnd 23-28: 18 sc. Fold in half with 9 sc. Attach black yarn tassels at tip, sew to back of base.
- Large Ring: White yarn. Ch 60, join to 1st ch. Increase up to 102 sc (Rnds 9-15), then decrease back down to 60 sc. Sew Rnd 22 to Rnd 1 while stuffing firmly.
- Middle Ring: White yarn. Ch 48, join to 1st ch. Increase up to 90 sc (Rnds 9-15), then decrease back down to 48 sc. Sew Rnd 22 to Rnd 1 while stuffing.
- Small Ring: White yarn. Ch 36, join to 1st ch. Increase up to 78 sc (Rnds 9-15), then decrease back down to 36 sc. Sew Rnd 22 to Rnd 1 while stuffing.
Start with Brown yarn (hooves), change to White yarn at Round 13. Work up to Round 38 (18 sc), fold in half, and connect with 9 sc. Embroider black hoof line and sew arms directly to the Small Stacking Ring.
Start with Light Pink yarn for snout (Rnds 1-13). Change to White yarn at Rnd 14. Leave a hole (18 ch) between Rnds 27-28 for cone insertion! Decrease to close head at Rnd 49. Insert 12mm safety eyes 10 sc apart. Return to opening hole between Rnds 27-28, attach White yarn, and crochet inner sleeve (36 sc down to 6 sc) pushed into the head.
Horns (Make 2): Ivory yarn, 18 rounds with gradual hdc increases for natural curve.
Ears (Make 2): Make 1 Pink inner circle and 1 White/Black outer circle (Rnds 1-6). Join wrong-sides together with BLO sc (Rnd 7-10) for a hollow curved ear.
Udder & Teats: Light Pink yarn. Udder body (19 rnds) + 4 teats (12 sc each). Sew to Large Ring (or attach via velcro straps for interactive play).
Black Spots (Types A, B, C, D, E): Crochet 5 oval black spots of varying sizes (Make 3 of each) and sew randomly across the body rings.
- Pinning Legs: Pin the front legs to the front of the cone base before sewing to ensure ideal balance when sitting.
- Facial Sculpting: Pull embroidery thread tightly between inner eye sockets and lower muzzle line for realistic snout shaping.
- Interactive Play: Use Velcro strips on the udder and inner head sleeve if you want removable components for young children!
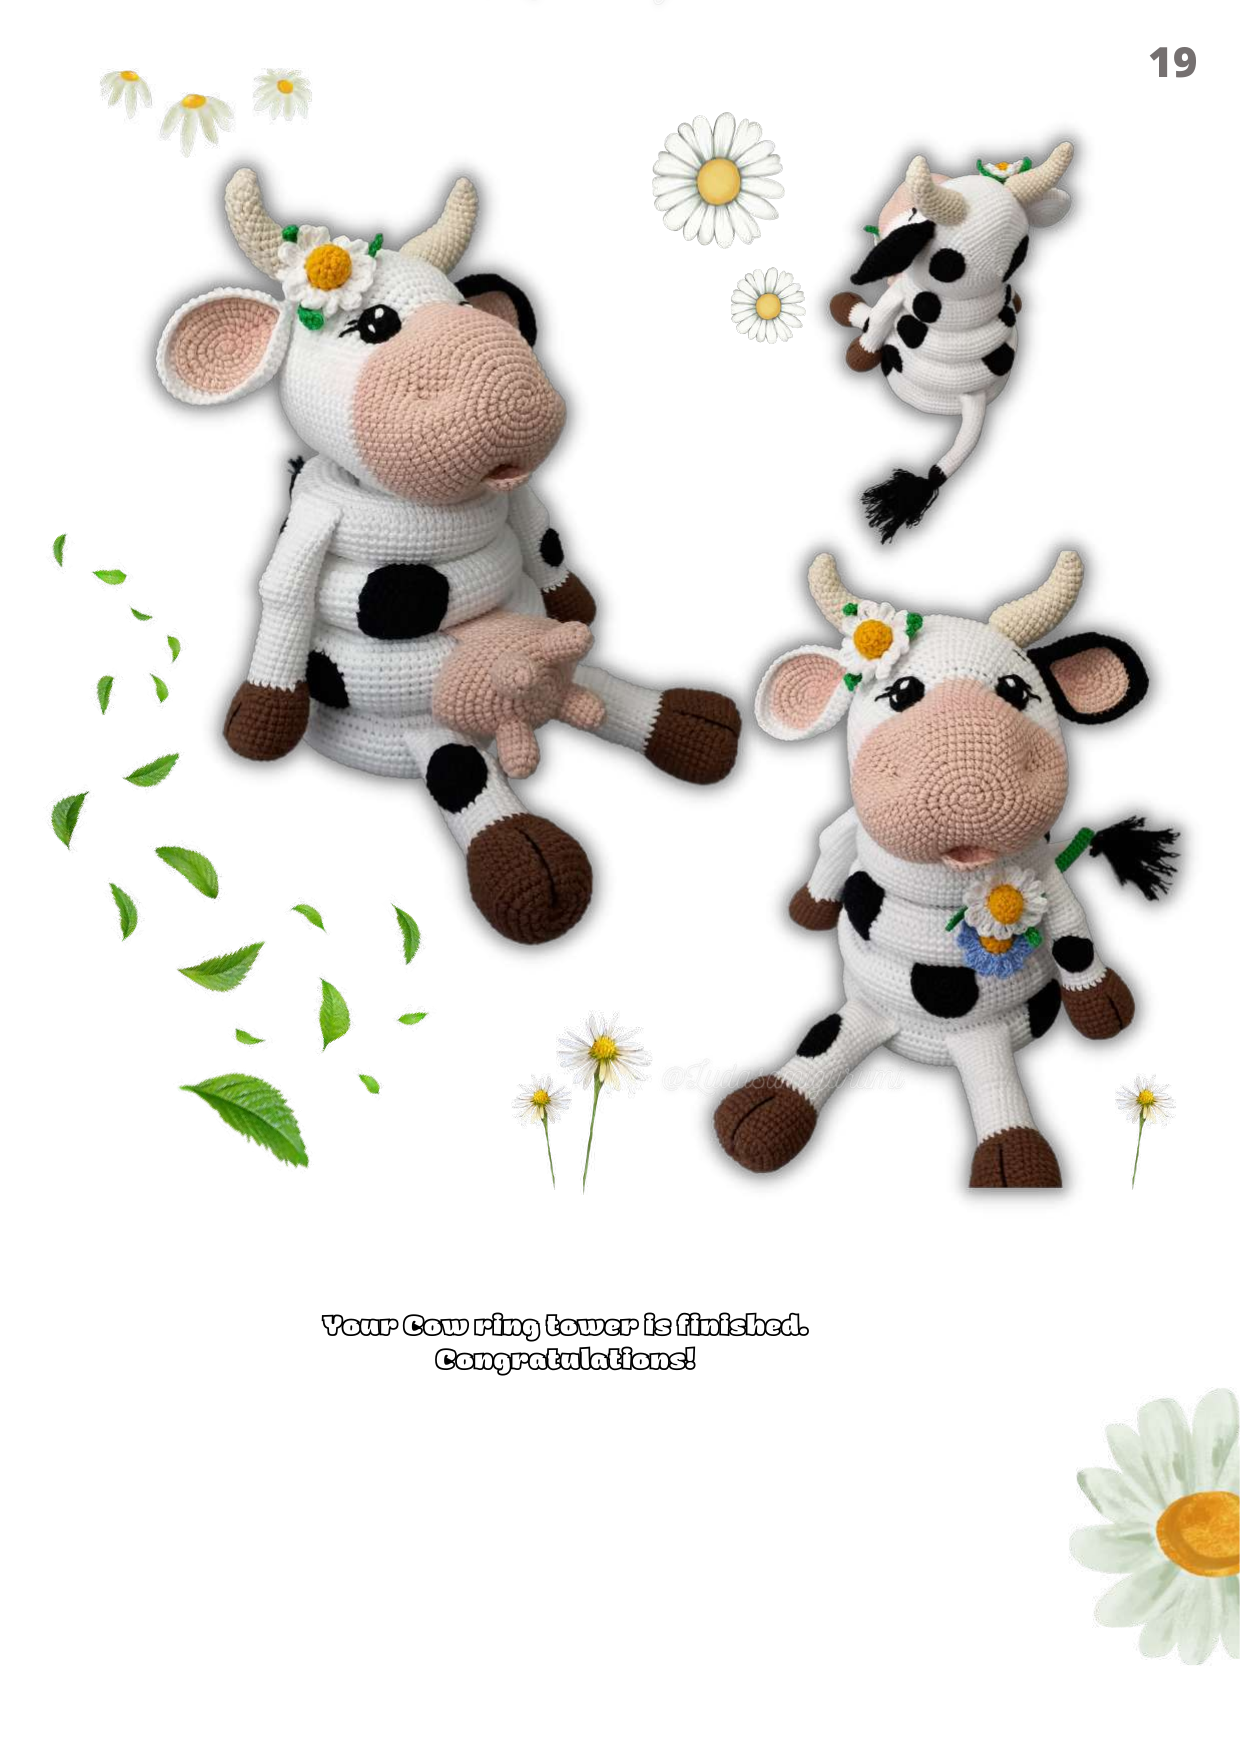
Congratulations! Your interactive Crochet Cow Stacking Toy is ready. This handmade ring tower is functional, educational, and absolutely delightful to play with!
Have you crocheted stacking toys before? Share your progress and leave a comment below! Happy crocheting!