
📌 Table of Contents
Pattern Overview & Sizing
The Easy 3-Hour Crochet Backpack combines thick 5 mm braided cotton cord with pre-punched leather accessories for a sleek, store-bought designer aesthetic. Using dense Cross Stitch Single Crochet (CrSC), this project works up in just one evening and holds its shape flawlessly.
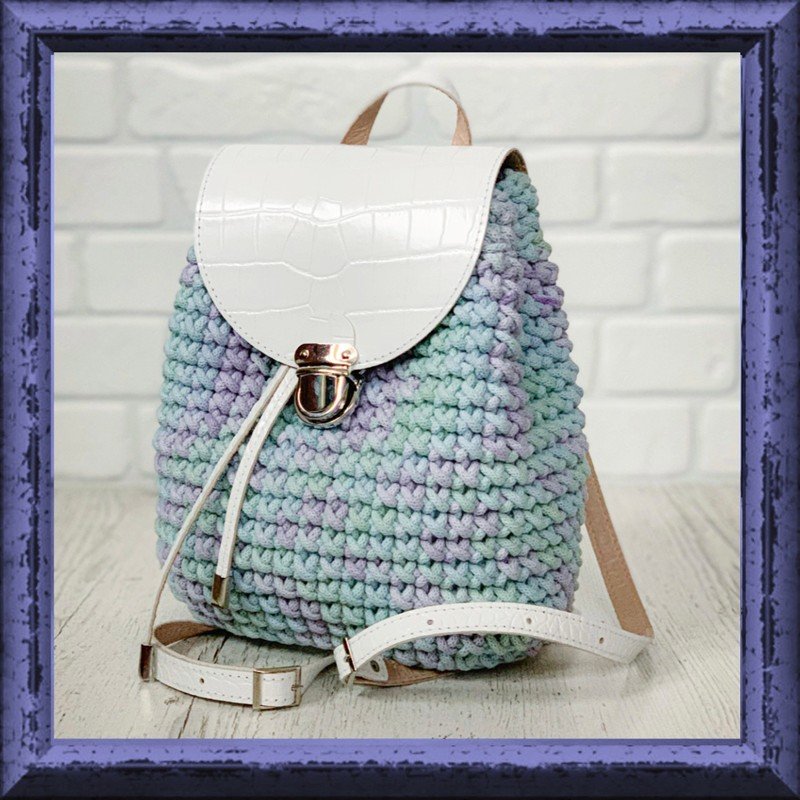
- Finished Dimensions: Length: 9.5 inches (24 cm) | Width: 6 inches (15 cm) | Height: 11.5 inches (29 cm).
- Skill Level: Beginner.
- Gauge: 9 stitches and 8 rows = 4×4 inches (10×10 cm).
Materials & Tools Needed
- Cord Yarn: 165 yards (150 meters) of 5 mm braided cotton cord (e.g. Bobbiny 5 mm) or 7–9 mm T-shirt yarn.
- Crochet Hooks: 4.0 mm (for base & flap holes) and 6.0 mm (for main body).
- Backpack Leather Kit:
- 1 pre-punched oval leather bottom (10 × 20 cm, ~43 holes).
- 1 leather flap/valve with metal twist lock.
- 2 adjustable leather shoulder straps with screw rivets.
- 1 leather drawstring tightening cord with metal tips and stopper.
- Notions: Sharp scissors, small Phillips screwdriver, drop of superglue/clear polish (to lock screws), and optional fabric lining.
Abbreviations & Pro Tips
- CH: Chain | SC: Single Crochet | SlSt: Slip Stitch | Inc: Increase (2 CrSC in same st)
- CrSC (Cross Single Crochet): Insert hook, yarn UNDER the hook (instead of yarn over), draw up loop, yarn over, pull through 2 loops. Creates tight X-shaped stitches with zero gaps.
- Tension Tip: Hold the hook at a slight angle rather than strictly perpendicular to keep stitches uniform and dense.
Step 1: Trimming the Leather Base (Hook 4 mm)
- Take the 4.0 mm hook. Leave a starting tail of approx. 40 inches (1 meter) long.
- Insert hook into any hole along the leather bottom, pull out loop, work 1 CH.
- Work 1 SC into each hole around the entire leather base (43 SC total for standard 43-hole base).
- Close the round seamlessly using the 1-meter tail: thread tail through the 1st SC from back to front and pull back into the last loop. Do not cut working cord.
Step 2: Crocheting Backpack Body in CrSC (Rows 1–19, Hook 6 mm)
Switch to the larger 6.0 mm hook:
- Row 1: Insert hook into Back Loop and jumper only. Work CrSC around while adding 6 increases (2 CrSC in 1) evenly distributed at curves -> 49 CrSC total. Bind off row seamlessly with the finishing tail.
- Rows 2–16: Work 49 CrSC in continuous spiral, finishing each row cleanly with CH. (49 sts)
- Row 17: 49 CrSC in Back Loop Only (BLO), pull out loop, CH.
- Row 18: 49 CrSC in BLO, CH.
- Row 19: 49 CrSC. Cut cord, bind off row seamlessly, tie ends inside, and fold the backpack side gussets inward with your hands.
Step 3: Crocheting in the Leather Flap & Lock Installation
- Switch back to 4.0 mm hook. Position the leather valve flap centered on the back of the backpack at the 3rd row from top.
- Crochet slip stitches directly through each pre-punched hole of the flap, skipping 1 CrSC between stitches. Fasten off inside.
- Installing Lock: Cut 3 pieces of cord 8 inches (20 cm) long. Position lower lock plate on the front wall, thread cord through plate prongs into inside of backpack, tie 3 secure knots in pairs, and trim ends.
Step 4: Drawstring Cinch, Straps & Final Lining
- Weaving Drawstring: Count 3 CrSC from the front lock to the left and right. Weave the leather tightening cord through 6 stitches on outside, 3 inside, and 6 on outside. Mirror on other side and attach leather cinch stopper.
- Installing Straps: Using a Phillips screwdriver, fasten the adjustable leather shoulder straps onto the backpack base and top back. Add a drop of superglue or clear polish to screw threads to lock them permanently.
- Optional: Hand-sew a fabric inner pouch lining. Your durable, ultra-stylish backpack is complete!
Explore More Free Bag Patterns